Documentation
Build pipelines, models and workflows in plain English, chart and dashboard what they produce, and connect your own AI tools — on rsync.ai Cloud or your own infrastructure.
Overview
Start herersync.ai is an AI-native data pipeline platform. You describe what you want in plain English and rsync.ai drafts it — generating missing connectors, moving data, building models and workflows, and charting the results. Nothing is created or started until you approve the plan.
Data pipelines
Describe a sync in plain English. Batch or real-time CDC.
AI connectors
On rsync.ai Cloud, generate a connector from a REST or GraphQL API's docs.
Models
Schedule a SQL query as a table that stays fresh, with checks.
Workflows
Query, check a condition, run a pipeline or model, and notify Slack or email.
Charts & dashboards
Chart any model, then put the charts on a live dashboard.
Ask rsync.ai
Draft pipelines, SQL, workflows and dashboards by asking.
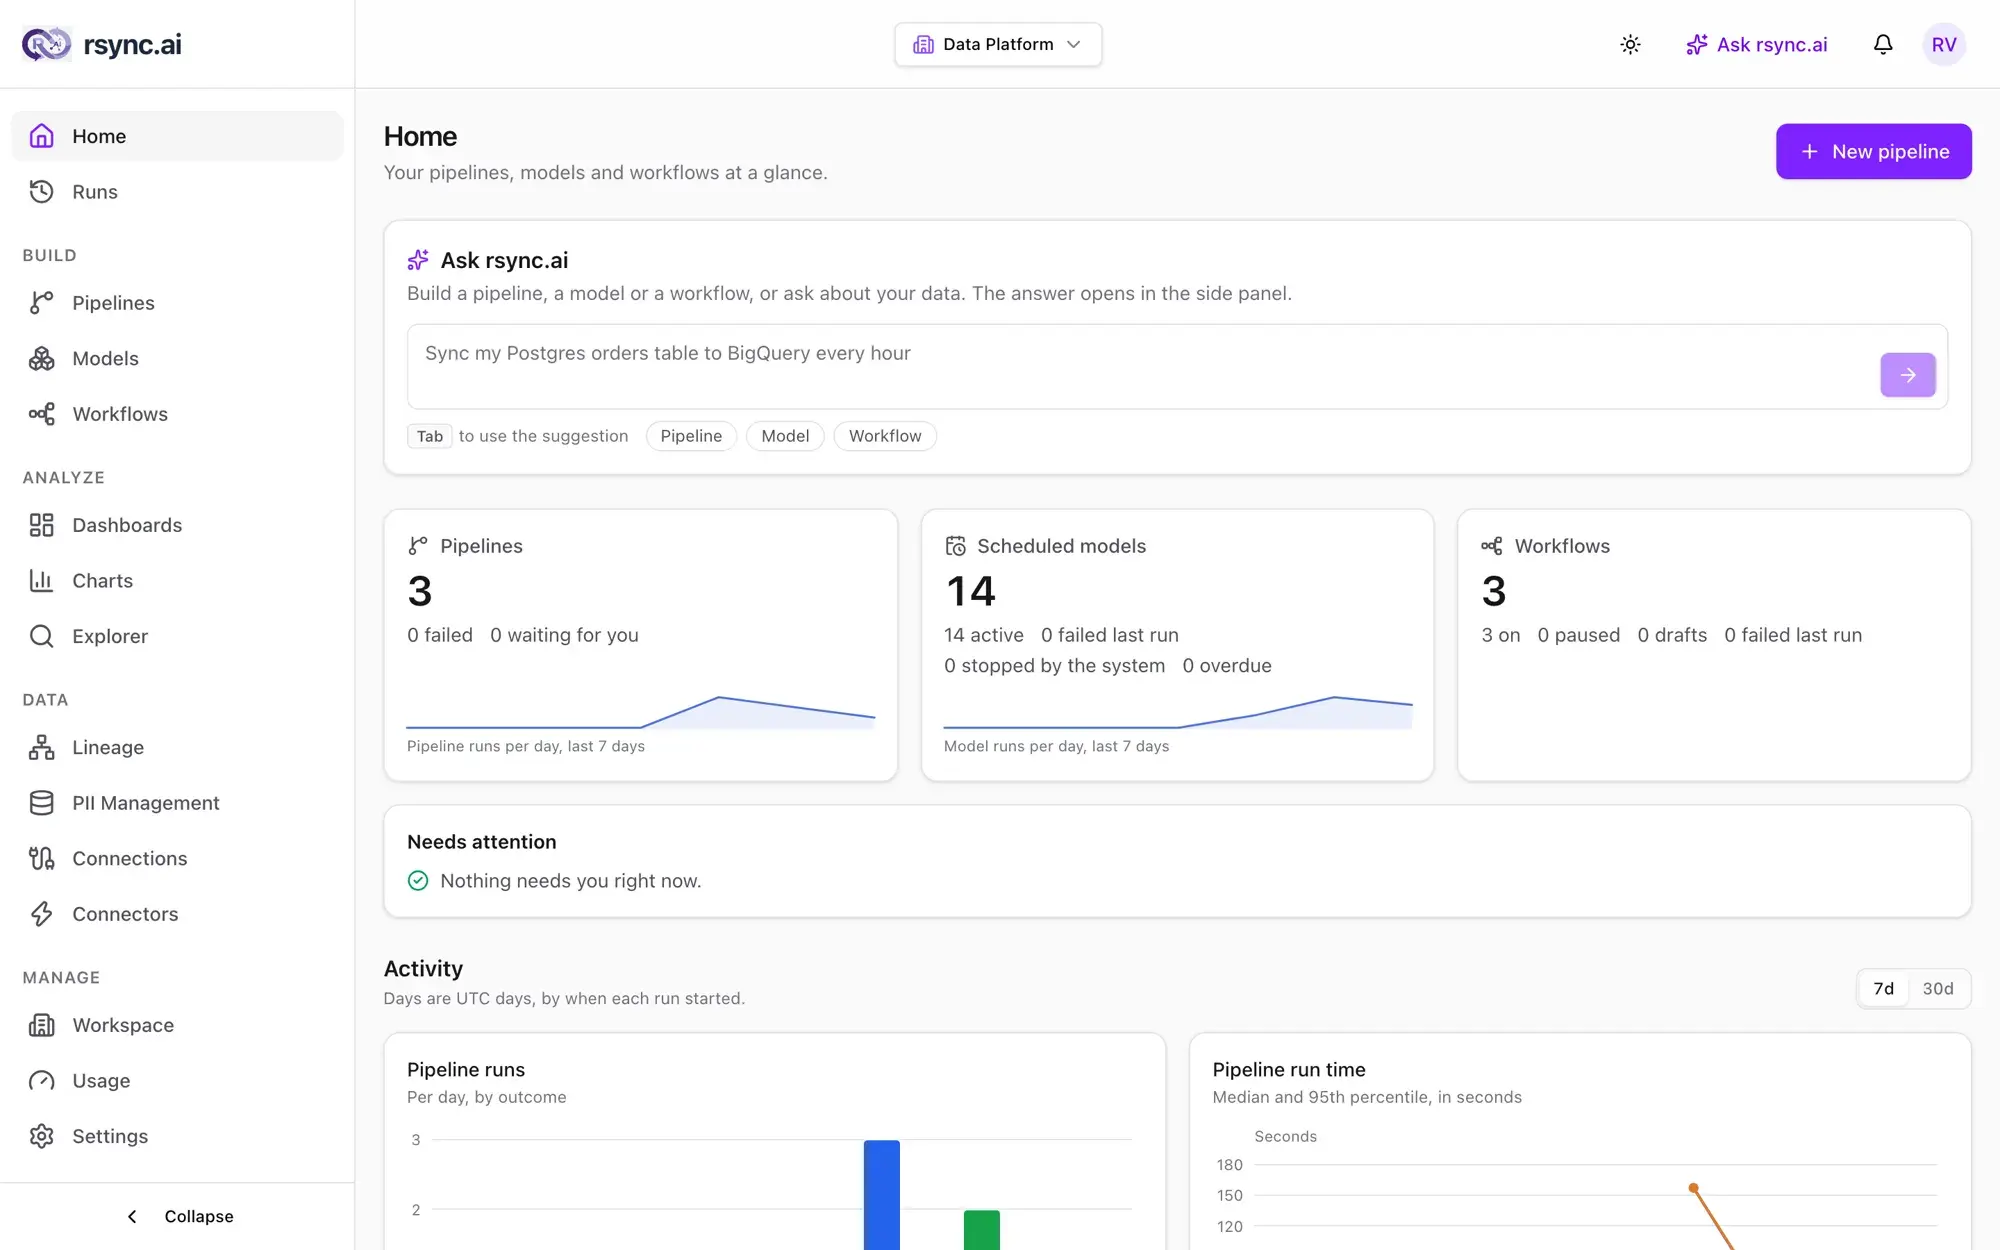
Quick start
- 1Sign up free at
app.rsync.ai— nothing to provision, start building immediately. (Prefer your own infrastructure? See Self-hosting — Docker or Kubernetes.) - 2Add a source and a destination under Connections, or click Start with sample data on Home.
- 3Describe your sync — "Sync Shopify orders to Postgres every hour" — in Pipelines → New pipeline, or ask Ask rsync.ai.
- 4If there's no connector for the source, the connector generator on rsync.ai Cloud builds one from its API docs.
- 5Review the plan, confirm, and the pipeline runs. Nothing starts before you do.
- 6Query the result in the Explorer, save it as a model, then chart it and put it on a dashboard.
Data Pipeline
A pipeline in rsync.ai moves data from a source to a destination on a schedule or in real time. You configure it in plain English — no YAML, no JSON, no DAGs.
How a pipeline runs
Supported sources
Databases (real-time CDC)
PostgreSQL, MySQL, SQL Server, Oracle, MongoDB
Databases (batch)
ClickHouse; MariaDB via the MySQL connector
Cloud warehouses
BigQuery, Databricks — Snowflake & Redshift in preview
Storage & files
AWS S3, GCS, Azure Blob, Google Sheets — blob passthrough for any file format
SaaS & APIs
Shopify — Stripe, GitHub & Notion in preview
Any REST / GraphQL API
via Tool Generator (generate on demand)
Destinations
- PostgreSQL (self-managed or cloud), MySQL, SQL Server, Oracle
- MongoDB and ClickHouse
- Google Sheets
- AWS S3, GCS, Azure Blob — structured files, CDC change files, or byte-identical blob passthrough
- BigQuery, Databricks — Snowflake & Redshift in preview
Schedule options
- Real-time (CDC) — log-based for Postgres, MySQL, SQL Server & Oracle; change streams for MongoDB. CDC pipelines run continuously, with an optional initial backfill
- Cron schedule in any timezone (UTC by default) — or just say it:
every 15 minutes,daily at 6am UTC - Fixed interval — every N minutes or hours (minimum 1 minute); a run is skipped if the previous one is still going
- Manual trigger — run on demand from the UI or API; schedules can be paused and resumed
AI connectors (Tool Generator)
The Tool Generator is the rsync.ai Cloud agent that builds a working connector for a REST or GraphQL API. No code to write — give it a docs URL, an OpenAPI or GraphQL schema, a sample curl command, or just the API's name, and it produces a versioned, containerized connector (an MCP server under the hood) in minutes.
What gets generated
- Authentication — API key (header or query), bearer token, basic auth, OAuth 2.0 (including client credentials), or a custom header
- Schema discovery — maps the API's resources and fields; GraphQL endpoints are introspected
- Pagination — offset, page number, cursor, and Link-header styles, with cursor fields auto-detected
- Rate-limit handling — honors
429 Retry-Afterwith exponential backoff - Dockerfile for isolated, reproducible execution
- Semantic versioning — regenerate at any time if the API changes
How to generate a connector
- 1Open Connectors → Generate a connector (or ask for a source that doesn't exist yet in chat or the pipeline builder) and give it the API's docs URL (e.g.
https://developers.notion.com/reference), an OpenAPI spec, a GraphQL endpoint, or just its name. - 2rsync.ai reads the docs or spec, identifies endpoints, and shows a contract preview of the resources it will sync — plus any open questions it couldn't answer from the docs.
- 3Answer the open questions and approve the contract — your human-in-the-loop gate. Nothing is generated until you do.
- 4The connector is built and is available to every pipeline in your workspace — usually within minutes.
Example — a Notion connector
Paste https://developers.notion.com/reference. The agent discovers Databases, Pages, Blocks, Users, and Comments endpoints, maps their schemas, and generates a connector that authenticates with your Notion integration token.
Query, chart and ask
Once a pipeline has landed data, the Explorer, Charts and Dashboards sit under Analyze in the sidebar, and Ask rsync.ai starts from Home. Each has its own page:
- Explorer — run SQL against any connection, save queries, share results, and start a chart
- Charts — seven chart types over a model or saved query
- Dashboards — saved charts on one live page, with filters and history
- Ask rsync.ai — describe what you want; it drafts the SQL, workflow or dashboard
API
RESTThe rsync.ai UI is built on the same REST API you can call directly — create pipelines, trigger runs, check execution status, and query results — so you can wire pipelines into CI, orchestrators, or your own apps.
Authentication
The base URL is https://app.rsync.ai/api/v1 (self-hosted: http://localhost:5001/api/v1). Sign in with POST /auth/login to get a session (valid 24 hours), sent back as a cookie or an Authorization: Bearer header. Write requests (POST, PATCH, PUT, DELETE) also need the csrf_token cookie echoed in an X-CSRF-Token header. All IDs are UUIDs.
# 1. Sign in — saves the session and CSRF cookies to jar.txt
curl -c jar.txt -X POST https://app.rsync.ai/api/v1/auth/login \
  -H "Content-Type: application/json" \
  -d "{\"email\":\"you@company.com\",\"password\":\"$RSYNC_PASSWORD\"}"
CSRF=$(awk '$6=="csrf_token"{print $7}' jar.txt)

# 2. Trigger a run — the response includes an execution_id
curl -b jar.txt -X POST https://app.rsync.ai/api/v1/pipelines/$PIPELINE_ID/run \
  -H "X-CSRF-Token: $CSRF"

# 3. Check the execution
curl -b jar.txt https://app.rsync.ai/api/v1/executions/$EXECUTION_ID
Core resources
/pipelines/pipelines/pipelines/{id}/run/executions/{id}/connections/connectors/sql/generate/explorer/queryReal-time CDC
Change Data Capture (CDC) streams row-level inserts, updates, and deletes from your database in real time. Supported for Postgres, MySQL, SQL Server, and Oracle via log-based CDC, and MongoDB via change streams. Other sources use scheduled batch sync.
Before a CDC pipeline starts, rsync.ai checks the prerequisites below and tells you exactly what's missing. Tables you capture need a primary key so updates and deletes can be applied at the destination. Changes can also land as insert/update/delete change files in S3, GCS, or Azure Blob.
Postgres setup
-- postgresql.conf (restart PostgreSQL afterwards)
wal_level = logical
max_replication_slots = 10   -- at least 1
max_wal_senders = 10         -- at least 1

-- On Amazon RDS / Aurora, set rds.logical_replication = 1 in the
-- parameter group instead; on Azure, azure.replication_support = logical.
Connect with a superuser (rds_superuser on RDS). rsync.ai then creates and manages everything else per pipeline: its own publication, its own replication slot, and REPLICA IDENTITY FULL on the captured tables.
MySQL setup
# Add to my.cnf / my.ini, then restart MySQL
[mysqld]
log_bin       = mysql-bin
binlog_format = ROW
binlog_row_image = FULL
server-id     = 1

-- Then, in MySQL, create the replication user
CREATE USER 'rsync'@'%' IDENTIFIED BY 'your-password';
GRANT SELECT, REPLICATION SLAVE, REPLICATION CLIENT ON *.* TO 'rsync'@'%';
SQL Server setup
- SQL Server 2016 or later, or Azure SQL Database at S3 / General Purpose tier or higher
- A user with
db_owneron the database (or sysadmin for the one-time database enable) - SQL Server Agent running (not needed on Azure SQL Database)
You don't need to run sp_cdc_enable_db or sp_cdc_enable_table yourself — rsync.ai enables CDC on the database and on each captured table.
Oracle setup
-- As a DBA. ARCHIVELOG needs an instance restart.
SHUTDOWN IMMEDIATE;
STARTUP MOUNT;
ALTER DATABASE ARCHIVELOG;
ALTER DATABASE OPEN;

-- Database-level minimal supplemental logging
ALTER DATABASE ADD SUPPLEMENTAL LOG DATA;

-- LogMiner privileges for the capture user
GRANT CREATE SESSION, SET CONTAINER, LOGMINING, SELECT ANY TRANSACTION,
      SELECT_CATALOG_ROLE, EXECUTE_CATALOG_ROLE TO rsync;
If the capture user can ALTER the captured tables, rsync.ai adds per-table supplemental logging (all columns) for you.
MongoDB setup
- MongoDB 4.4 or later, or MongoDB Atlas
- A replica set or sharded cluster — change streams aren't available on a standalone server
- A user with the
readrole on the database
Unstructured Data
rsync.ai can move any file format between cloud object stores — byte-identical, no parsing required. PDFs, images, Parquet files, video, archives, or any binary — if it lives in S3, GCS, or Azure Blob, rsync.ai can copy it to any of the three.
What "blob passthrough" means
The file is read from the source byte-by-byte and written to the destination without parsing, transformation, or re-encoding. Its SHA-256 is checked at the destination, so every byte that left the source arrives unchanged.
Supported pairs (v1)
capability_mismatch error when the pipeline is planned — before anything moves. A raw binary can't be written to a table row without parsing.Limits
- Maximum file size: 1.5 GiB per object by default
- Batch pipelines only — blob passthrough doesn't run on CDC
- SHA-256 integrity verified on every transfer — mismatches fail loudly
Coming soon
- ◦Parse-for-AI — extract structured text from PDFs and images, chunk, and send to a vector store (separate lane from blob passthrough)
Self-hosting
app.rsync.ai — nothing to deploy. Self-hosting is available now as a public, self-serve install — one command brings up the full stack on your own server or Kubernetes cluster.rsync.ai is source-available under the rsync.ai Source-Available License — free to self-host for your company's internal use. Self-hosted and Cloud run the same images: a Next.js UI, a Go API gateway and orchestrator, Temporal for durable workflows, Postgres for metadata, Redis, Kafka (with Kafka Connect and Debezium for CDC), MinIO for staging, the LLM service, and the MCP connector containers. Prebuilt multi-arch images (amd64 and arm64) are pulled from GitHub Container Registry and pinned to a tagged release.
Choose an install path
| Option | Single VM — Docker Compose | Kubernetes — Helm |
|---|---|---|
| Best for | Evaluations, single teams, one server in your VPC | Clusters you already run; replicated UI and API |
| Install | install.sh | install-k8s.sh or the Helm chart |
| Bring your own | Kafka, Postgres | Kafka, Postgres, Redis, S3 / GCS / Azure Blob, Temporal |
| Status | Recommended starting point | In preview |
Requirements
- Single VM: Linux or macOS with Docker Engine 24+ and Docker Compose v2
- Memory: 8 GB minimum, 16 GB recommended — 6 GB is enough for a batch-only install; plan 12 GB+ with the bundled local LLM
- CPU and disk: 4 cores and 40 GB SSD minimum; 8 cores and 100 GB+ recommended
- Kubernetes: 1.25+, Helm 3.8+,
kubectl, a default StorageClass, and about 9 GiB of memory and 4 CPUs of free requests — a single 4-vCPU node isn't enough - An LLM is optional: OpenAI, Azure OpenAI, Groq, any OpenAI-compatible endpoint, or the bundled Ollama for a fully offline stack
What's different from Cloud
- Pipelines, CDC, the built-in connector catalog, models, workflows, the Explorer, charts, dashboards and workspaces all work self-hosted — with no plan quotas
- OAuth connectors (Google and GitHub) need your own OAuth app client ID and secret
- Email invites and notifications need your own SMTP credentials
- ◦AI connector generation (the Tool Generator) is a Cloud feature — it isn't included in the self-hosted image
- ◦Hosted monitoring dashboards (overview, infrastructure, traces) aren't deployed in a self-hosted stack
- ◦Workspaces and roles are included, but a self-hosted install is designed for one team — not for hosting rsync.ai for other companies
Install on a single VM
Docker Compose- 1Run the installer on the server:
curl -sSL https://raw.githubusercontent.com/rsync-ai/rsync.ai/main/install.sh | bash
It checks Docker and memory, generates every secret, pulls the pinned release, and starts the stack. Change data capture is included by default. - 2Answer two prompts: which LLM to use (your OpenAI key, the bundled Ollama, or none for now), and your domain or server IP. Keep the default
localhostto try it on your own machine. For a domain, pick behind a reverse proxy to serve it over HTTPS (see HTTPS below). - 3Open
http://localhost:3000(or your domain) and sign up. The first account becomes the admin — on a server reachable from the internet, create it straight away.
What gets installed
Everything lives in ~/rsync-ai: the generated .env (readable only by you), the Compose files, and compose.sh — a wrapper with the right files and profiles baked in, so you never have to remember the flags. Only two ports are published, both on 127.0.0.1 unless you choose otherwise: 3000 for the UI and 5001 for the API.
cd ~/rsync-ai
./compose.sh ps                    # service status
./compose.sh logs -f api-gateway   # follow one service's logs
./compose.sh restart orchestrator  # restart one service
./compose.sh down                  # stop everything (add -v to also delete data)
./compose.sh up -d                 # start again
Unattended installs
Settings go after the pipe, on the bash side — VAR=x curl … is silently ignored. With no terminal attached the installer skips its prompts:
# OpenAI
curl -sSL https://raw.githubusercontent.com/rsync-ai/rsync.ai/main/install.sh | OPENAI_API_KEY=sk-... bash

# Bundled Ollama — fully offline (a GPU is strongly recommended for the AI features)
curl -sSL https://raw.githubusercontent.com/rsync-ai/rsync.ai/main/install.sh | LLM_PROVIDER=ollama bash

# No LLM yet — pipelines, SQL, CDC, and connectors all still work
curl -sSL https://raw.githubusercontent.com/rsync-ai/rsync.ai/main/install.sh | LLM_PROVIDER=none bash

# Batch-only: skip the CDC services and drop the memory floor to 6 GB
curl -sSL https://raw.githubusercontent.com/rsync-ai/rsync.ai/main/install.sh | RSYNC_PROFILES= bash
Groq and Azure OpenAI work the same way (LLM_PROVIDER=groq GROQ_API_KEY=…, or LLM_PROVIDER=azure with AZURE_OPENAI_ENDPOINT, AZURE_OPENAI_API_KEY, and AZURE_OPENAI_DEPLOYMENT). Streaming (CDC) pipelines need the default cdcprofile — a batch-only install can't run them. The profile isn't saved in .env: keep passing RSYNC_PROFILES= on every re-run and upgrade if you want to stay batch-only.
HTTPS with a reverse proxy
Choose behind a reverse proxy at the domain prompt. The ports stay on 127.0.0.1 and the installer sets PUBLIC_URL=https://your-domain. Then route /api, /ws (WebSocket), and /oauth/callback to the API on 127.0.0.1:5001, and everything else to the UI on 127.0.0.1:3000. With Caddy, which also gets the certificate for you:
# /etc/caddy/Caddyfile
rsync.example.com {
    @api path /api/* /ws /ws/* /oauth/callback/*
    reverse_proxy @api 127.0.0.1:5001
    reverse_proxy 127.0.0.1:3000
}
nginx or a cloud load balancer works the same way — forward the WebSocket upgrade headers on /ws. Serving over https requires RSYNC_COOKIE_SECURE=true (the installer sets it for you); over plain http it must be false, or sign-in won't stick.
Configuration
The installer writes ~/rsync-ai/.env. To change anything, edit the file and re-run the installer — it finds the existing .env, skips the prompts, and applies it.
# ~/rsync-ai/.env  (generated by install.sh)
RSYNC_VERSION=0.1.8            # image tag of the installed release — change it by upgrading, not by hand

LLM_PROVIDER=openai            # openai | azure | groq | ollama | none
OPENAI_API_KEY=sk-...          # only when LLM_PROVIDER=openai
OPENAI_BASE_URL=               # optional: any OpenAI-compatible endpoint (vLLM, OpenRouter, Vertex AI)
LLM_MODEL=                     # optional: override the provider's default model

NEXTAUTH_URL=http://localhost:3000       # where people open the UI
PUBLIC_URL=http://localhost:5001         # where the browser reaches the API
PUBLIC_WS_URL=ws://localhost:5001/ws
RSYNC_BIND_ADDR=127.0.0.1      # 0.0.0.0 publishes 3000/5001 on every interface
RSYNC_COOKIE_SECURE=false      # true when served over https

ENCRYPTION_KEY=...             # generated — encrypts saved credentials
JWT_SECRET=...                 # generated — signs user sessions
INTERNAL_SERVICE_SECRET=...    # generated — service-to-service auth
POSTGRES_PASSWORD=...          # generated — bundled metadata database
REDIS_PASSWORD=...             # generated

# Optional
SMTP_HOST=  SMTP_PORT=587  SMTP_USER=  SMTP_PASSWORD=  SMTP_FROM=
NOTIFIER_SLACK_WEBHOOK_URL=
GITHUB_CLIENT_ID=  GITHUB_CLIENT_SECRET=   # callback: https://your-domain/oauth/callback/github
GOOGLE_CLIENT_ID=  GOOGLE_CLIENT_SECRET=   # callback: https://your-domain/oauth/callback/google
~/rsync-ai/.env — it holds ENCRYPTION_KEY. Reinstalling with a different key makes every saved connection permanently undecryptable.Install on Kubernetes
HelmPoint kubectl at a cluster and run:
curl -sSL https://raw.githubusercontent.com/rsync-ai/rsync.ai/main/install-k8s.sh | bash
The installer checks the cluster, the StorageClass, and free capacity (trimming optional pieces to fit rather than leaving pods Pending), downloads Helm if it's missing, generates secrets into ~/rsync-ai-k8s/.env, and installs the chart with --wait. Configure it the same way — settings after the pipe:
curl -sSL https://raw.githubusercontent.com/rsync-ai/rsync.ai/main/install-k8s.sh | \
  RSYNC_APP_HOST=rsync.example.com RSYNC_API_HOST=api.rsync.example.com \
  RSYNC_INGRESS_CLASS=nginx RSYNC_TLS_SECRET=rsync-tls \
  RSYNC_CONNECTORS=postgresql,mysql,mongodb \
  RSYNC_EXTRA_VALUES=./my-values.yaml \
  bash

# Render the values without installing anything
curl -sSL https://raw.githubusercontent.com/rsync-ai/rsync.ai/main/install-k8s.sh | bash -s -- --render-only
RSYNC_NAMESPACE/RSYNC_RELEASE— both default torsync-ai. Installs made before v0.1.8 usedrsync; the installer finds one and upgrades it in place, so usersyncin the commands below if yours is olderRSYNC_STORAGE_CLASS— when the cluster has no default StorageClassRSYNC_APP_HOST+RSYNC_API_HOST— set both (or neither) to create an Ingress; addRSYNC_TLS_SECRETfor httpsRSYNC_CONNECTORS— connector pods to run (defaultpostgresql,mysql,mongodb,aws-s3,gcs)RSYNC_LLM_PROVIDER—openai(readsOPENAI_API_KEYfrom your shell) orollamaRSYNC_EXTRA_VALUES— your own values file, applied last. Use it for external Kafka and external Postgres
Without an Ingress, reach it with port-forwards, then check the install:
kubectl -n rsync-ai port-forward svc/rsync-ai-frontend 3000:3000
kubectl -n rsync-ai port-forward svc/rsync-ai-api-gateway 8080:8080

kubectl -n rsync-ai get pods
helm -n rsync-ai test rsync-ai
Using Helm directly
The chart is published at oci://ghcr.io/rsync-ai/charts/rsync-ai — no registry login needed. Pin a version; latestisn't supported.
helm install rsync-ai oci://ghcr.io/rsync-ai/charts/rsync-ai --version 0.1.8 \
  --namespace rsync-ai --create-namespace \
  --set secrets.jwtSecret="$(openssl rand -base64 32)" \
  --set secrets.encryptionKey="$(openssl rand -base64 32)" \
  --set secrets.internalServiceSecret="$(openssl rand -hex 24)" \
  --set secrets.postgresPassword="$(openssl rand -hex 24)" \
  --set secrets.minioAccessKey="$(openssl rand -hex 16)" \
  --set secrets.minioSecretKey="$(openssl rand -base64 32)" \
  --set frontend.publicUrl=https://rsync.example.com \
  --set frontend.apiUrl=https://api.rsync.example.com \
  -f my-values.yaml   # must set connectors.fleet, or no connector pod starts
Values files for EKS, GKE, and AKS — and a fully bring-your-own variant — live in deploy/helm/rsync-ai; pass one with -f from the release tag you install. Keep secrets out of your shell history with secrets.existingSecret, and keep passwords to letters and digits (openssl rand -hex 24).
# Save the encryption key somewhere safe
kubectl -n rsync-ai get secret rsync-ai-secrets -o jsonpath='{.data.ENCRYPTION_KEY}' | base64 -d- ◦Connector pods are chosen at install time (
connectors.fleet) — Kubernetes has no Docker socket, so connectors aren't built on demand - ◦The bundled Postgres is a single pod with no backups — fine for a trial; point production at a managed database
- ◦Bundled Ollama:
--set ollama.enabled=true --set generation.llm.provider=ollamawith--timeout 30mfor the model download
Use your own Kafka
The bundled Kafka is a single broker — right for a trial, not for production CDC. Point rsync.ai at Amazon MSK, Confluent Cloud, Aiven, Google Managed Kafka, or your own cluster instead. Kafka Connect and Debezium keep running inside the rsync.ai stack and connect to your brokers.
Single VM
Add the connection to ~/rsync-ai/.env and re-run the installer. When KAFKA_BROKERS points anywhere other than the bundled broker, the installer switches the bundled Kafka off and creates the rsync.ai topics on your cluster.
# ~/rsync-ai/.env — SASL/SCRAM over TLS (e.g. Amazon MSK on port 9096)
KAFKA_BROKERS=b-1.example.kafka.us-east-1.amazonaws.com:9096,b-2.example.kafka.us-east-1.amazonaws.com:9096
KAFKA_SECURITY_PROTOCOL=SASL_SSL
KAFKA_SASL_MECHANISM=SCRAM-SHA-512
KAFKA_SASL_USERNAME=rsync
KAFKA_SASL_PASSWORD=...
# Kafka Connect (CDC) reads its credentials from a JAAS line:
KAFKA_SASL_JAAS_CONFIG=org.apache.kafka.common.security.scram.ScramLoginModule required username="rsync" password="...";
KAFKA_REPLICATION_FACTOR=3
KAFKA_MIN_INSYNC_REPLICAS=2
curl -sSL https://raw.githubusercontent.com/rsync-ai/rsync.ai/main/install.sh | bash
./compose.sh logs orchestrator api-gateway | grep -i kafka   # confirm the connection
- Always set
KAFKA_SECURITY_PROTOCOLwhen you set credentials (SASL_SSL,SSL,SASL_PLAINTEXT). Without it, clients connect anonymously and a pipeline can finish with an empty destination. - Mechanisms:
PLAIN,SCRAM-SHA-256,SCRAM-SHA-512, andOAUTHBEARER(KAFKA_SASL_OAUTHBEARER_TOKEN_ENDPOINT,_CLIENT_ID,_CLIENT_SECRET). On MSK, use SCRAM — IAM auth isn't supported by the CDC services. - Private CA or mutual TLS: set
KAFKA_SSL_CA_LOCATION(plusKAFKA_SSL_CERT_LOCATIONand an unencrypted PKCS#8KAFKA_SSL_KEY_LOCATION) to paths inside the containers, and mount the files with a small Compose overlay of your own. Managed Kafka with a public CA needs none of this. - Topic prefix: everything is namespaced under
rsync.(KAFKA_TOPIC_PREFIX). Decide before the first run — changing it later renames every topic and consumer group.
Kubernetes
# my-values.yaml
kafka:
  enabled: false
  replicationFactor: 3            # required with external Kafka
  external:
    bootstrapServers: "b-1.example.kafka.us-east-1.amazonaws.com:9096,b-2.example.kafka.us-east-1.amazonaws.com:9096"
    securityProtocol: SASL_SSL    # PLAINTEXT | SASL_PLAINTEXT | SASL_SSL | SSL
    saslMechanism: SCRAM-SHA-512  # PLAIN | SCRAM-SHA-256 | SCRAM-SHA-512 | OAUTHBEARER
    saslUsername: rsync
    saslPassword: ""              # or key KAFKA_SASL_PASSWORD in secrets.existingSecret
    # tls: leave empty for public-CA managed Kafka (MSK, Confluent Cloud, Aiven).
    # Set tls.caCert only for a private CA — it replaces the default trust store.
ACLs for a secured cluster
If your cluster enforces ACLs, grant the rsync.ai principal (here User:rsync):
| Resource | Pattern | Operations |
|---|---|---|
| Topic rsync. | PREFIXED | Read, Write, Describe, Delete |
| Topic _rsync-connect- | PREFIXED | Read, Write, Describe |
| Group rsync. | PREFIXED | Read, Describe, Delete |
| Group rsync-connect-cluster | LITERAL | Read |
| Cluster | — | Describe, Create |
Use your own Postgres
Postgres is rsync.ai's metadata store: pipeline definitions, run history, and the encrypted connection credentials — your pipeline rows never land here. For production, use a managed database with backups (Amazon RDS, Cloud SQL, Azure Database for PostgreSQL). The bundled database is PostgreSQL 16; on RDS, use 13 or newer.
1. Create the role
rsync.ai creates its three databases (pipeline_db, temporal, temporal_visibility) and two extensions (uuid-ossp, pg_trgm) on first start. The login role is the one thing you create:
CREATE ROLE rsync LOGIN PASSWORD 'use-letters-and-digits-only' CREATEDB;
- If the role can't have
CREATEDB, create the three databases yourself as an admin — the installer finds them and moves on - On Azure, add
uuid-osspandpg_trgmto theazure.extensionsserver parameter first - Schema migrations run automatically every time the API gateway starts
2a. Single VM
Add the connection to ~/rsync-ai/.env and re-run the installer. When POSTGRES_HOST is set, the bundled Postgres is switched off and a one-time init job prepares your database before anything else starts.
# ~/rsync-ai/.env
POSTGRES_HOST=my-instance.abc123.us-east-1.rds.amazonaws.com
POSTGRES_PORT=5432
POSTGRES_USER=rsync
POSTGRES_PASSWORD=...
POSTGRES_DB=pipeline_db
POSTGRES_SSLMODE=require
POSTGRES_TLS_ENABLED=true      # Temporal's own TLS switch — set it whenever the server requires TLS
curl -sSL https://raw.githubusercontent.com/rsync-ai/rsync.ai/main/install.sh | bash
curl -s localhost:5001/ready # {"status":"ready"} once migrations have runPOSTGRES_SSLMODE covers the rsync.ai services, but Temporal only reads POSTGRES_TLS_ENABLED— without it the workflow engine never starts and every pipeline hangs with no TLS error in the logs. Switching an existing install doesn't move its data — migrate with pg_dump first.2b. Kubernetes
# my-values.yaml
postgresql:
  enabled: false
  external:
    host: my-instance.abc123.us-east-1.rds.amazonaws.com
    port: 5432
    sslMode: require             # also switches on Temporal's TLS
secrets:
  postgresPassword: "..."        # or key POSTGRES_PASSWORD in secrets.existingSecret
A pre-install hook creates the databases and extensions, and runs again on every upgrade. Using IAM database authentication? Set postgresql.external.iamAuth=true and run the token proxy yourself — the hook is skipped, so create the three databases and extensions beforehand.
Other external services (Kubernetes)
- Redis:
redis.enabled=falseplusredis.external.host. Connections are unencrypted, so TLS-only services (such as Azure Cache for Redis on port 6380) won't work. - Object storage:
objectStorage.modes3,gcs, orazureinstead of MinIO. Leave the keys empty to use IRSA, GKE Workload Identity, or AKS workload identity. - Temporal:
temporal.enabled=falseplustemporal.external.address— Temporal Cloud works too.
On a single VM, Redis, MinIO, and Temporal always run in the bundled stack.
Upgrades, backups & health
Health and logs
curl -s localhost:5001/ready    # 200 {"status":"ready"} — database reachable, schema migrated
curl -s localhost:5001/health   # liveness only

cd ~/rsync-ai
./compose.sh ps
./compose.sh logs --tail=100 api-gateway
docker logs rsync-ai-api-gateway 2>&1 | grep "Startup check:"   # settings a service is missing

kubectl -n rsync-ai get pods
kubectl -n rsync-ai logs deploy/rsync-ai-api-gateway
Upgrade
Re-run the installer with the release you want. It keeps your .env and secrets, saves the previous Compose file as docker-compose.quickstart.yml.previous, and database migrations apply when the API gateway restarts.
# Single VM
curl -sSL https://raw.githubusercontent.com/rsync-ai/rsync.ai/main/install.sh | RSYNC_REF=vX.Y.Z bash

# Kubernetes
curl -sSL https://raw.githubusercontent.com/rsync-ai/rsync.ai/main/install-k8s.sh | RSYNC_CHART_VERSION=X.Y.Z bash
# …or: helm upgrade rsync-ai oci://ghcr.io/rsync-ai/charts/rsync-ai --version X.Y.Z -n rsync-ai -f my-values.yaml
# roll back with: helm -n rsync-ai rollback rsync-ai
./compose.sh pull && ./compose.sh up -dre-pulls the version you already run — it doesn't upgrade. The version is pinned in .env.Back up
Three things matter: the .env file (it holds ENCRYPTION_KEY), the metadata databases, and — if you use it for staging — MinIO's volume. With an external Postgres, rely on your provider's backups instead.
cd ~/rsync-ai
cp .env ~/rsync-env-backup-$(date +%F)          # store it somewhere safe, off the server

for db in pipeline_db temporal temporal_visibility; do
  ./compose.sh exec -T postgres pg_dump -U rsync "$db" | gzip > "$db-$(date +%F).sql.gz"
done

# Restore into a fresh install that uses the SAME .env:
gunzip -c pipeline_db-2026-09-26.sql.gz | ./compose.sh exec -T postgres psql -U rsync pipeline_db
# Volume snapshot (stop the stack first). Volumes are named rsync-ai_<name>:
# postgres_data, kafka_data, redis_data, minio_data, blob_staging_data, connect_secrets
./compose.sh stop
docker run --rm -v rsync-ai_minio_data:/data -v "$PWD":/backup alpine tar czf /backup/minio_data.tgz -C /data .
./compose.sh start
Users and roles
The first account to sign up becomes the admin; later sign-ups join as user unless an invite says otherwise. Admins change roles — viewer, user, power_user, admin — under Admin → Users. Email invites need SMTP configured.
Uninstall
# Single VM
cd ~/rsync-ai && ./compose.sh down        # add -v to delete all data

# Kubernetes — the Secret and volumes survive a plain uninstall
helm uninstall rsync-ai -n rsync-ai
kubectl -n rsync-ai delete pvc -l app.kubernetes.io/instance=rsync-ai
kubectl -n rsync-ai delete secret rsync-ai-secrets
Troubleshooting
- “rsync.ai did not come up”, or /ready reports schema_not_migrated or db_ping_failed
- The API gateway lost the startup race with Postgres. Run
./compose.sh restart api-gateway. - The UI isn’t reachable from another machine
- Ports bind to 127.0.0.1 unless you chose direct access. Put a reverse proxy in front (HTTPS), or set
RSYNC_BIND_ADDR=0.0.0.0and open TCP 3000 and 5001 in your firewall or security group. - Sign-in seems to work, then drops you back to the login page
RSYNC_COOKIE_SECUREdoesn't match the scheme —truefor https,falsefor plain http.- Port 3000 or 5001 is already in use
- The installer reports the conflict. Stop the other service, or change the host side of the port mapping in the Compose file.
- A streaming (CDC) pipeline fails its pre-flight check
- The install is batch-only. Re-run the installer without
RSYNC_PROFILES=— CDC is on by default. - An AI feature says “Set up an LLM first”
- No LLM is configured. Set
LLM_PROVIDERand a key (orollama) in.envand re-run the installer. For Azure OpenAI,AZURE_OPENAI_DEPLOYMENTmust match the deployment name exactly. - Containers restart with exit code 137
- Out of memory — confirm with
docker inspect <container> --format='{{.State.OOMKilled}}'. Add RAM, or drop CDC withRSYNC_PROFILES=if you only need batch. - External Kafka: the pipeline completes but the destination is empty, or it stalls
- Set
KAFKA_SECURITY_PROTOCOLalongside your credentials, and check the consumer-group ACLs. - External Postgres: db-init fails, or every pipeline hangs
- Check host, port, password, and
POSTGRES_SSLMODE; grantALTER ROLE rsync CREATEDB;; on Azure, allow-list the extensions. If pipelines hang with no error, setPOSTGRES_TLS_ENABLED=true. - Kubernetes: pods stuck in Pending
- Not enough free capacity, or no default StorageClass — set
RSYNC_STORAGE_CLASS. Before reinstalling, delete PVCs and thersync-ai-secretsSecret (rsync-secretsbefore v0.1.8) left by a previous install.
Still stuck? Open an issue or ask in GitHub Discussions, or email hello@rsync.ai.
License
rsync.ai is source-available under the rsync.ai Source-Available License. In short:
- Free to self-host, copy and modify for your company's internal business use, or for non-commercial use
- You can charge for your own work installing, configuring or supporting it on infrastructure your client controls
- Reselling it, hosting it for others as a service, or building it into a product you sell needs a commercial license
- You may not circumvent license-key functionality or remove licensing and copyright notices
Releases up to and including v0.1.7 stay under the Elastic License 2.0 they shipped with. The license page has the full text.
Self-hosted deployments are self-serve — grab the installer from GitHub and run it in your own VPC. For a commercial license, contact us.
Ready to try it?
Start building on rsync.ai Cloud today — or self-host on your own infrastructure now.